Step up your makeup routine by following the right choreography. Eyes before face, blush before brows…believe it or not, there’s a rhyme and a reason to how you should put on your makeup!
Step Into the Perfect Look
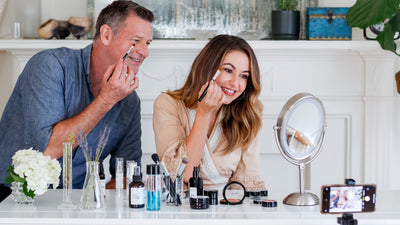
One of the first questions I get when it comes to makeup application is, “What do I do first?” So many of us get stuck in a rut when it comes to the actual order in which we put on our face. To be the most efficient, effortless you, follow these simple steps:
Make sure you’re starting with a clean slate by washing your face with a gentle cleanser. Because the eyes are going to be the very first part of our makeup routine, you’ll want to prep the area with an eye serum. My ILLUMINATE & CONTOUR EYE TREATMENT is a great option, working as both a primer and a multi-perfection eye treatment. Not only are you giving the shadow something to stick to, you’re also providing long-term care for one of the most sensitive areas of the face!
Using your pinky, apply the serum/primer to your under eye, then sweep up and over the lid. Apply up and out! The product will absorb quickly, before you start layering on shadows.
After you’ve prepped the eye area, you’ll want to prep the rest of your face. Now’s the time to add in any specific treatments for complexion, neck, or lips. Once you’re moisturized and primed, you can refocus on the eyes.
An Eye Full
Always begin your makeup routine with the eyes. Any fallout shadow can easily be wiped away without ruining carefully placed concealer or blush. We’re going for effortlessly elegant here, and that requires efficiency!
- Eyeshadow: Apply your first shadow with a firm but fluffy brush up to the crease. If you’re worried about any crepey texture on your lid, avoid using products with shimmer. Using a firm brush, apply a shadow in a darker or lighter shade - depending on your look - above the lashes, blending up and into the crease. My SILKY SMOOTH EYE SHADOWS are perfect for creating intricately blended finished looks.
- Soften and blend. Begin at the line of demarcation, moving your brush in soft swirls. Add a pop of highlighter shadow to the inner eye and under the brows to really make the eyes stand out. This also gives the highest point of the brow arch some brightness.
- Liner: Add eyeliner to the upper waterline to thicken your lashes and really frame the eyes. I always recommend a black kohl pencil, which won’t pull and can be smudged to create the illusion of a thicker lash line. These EYE LINERS are my favorites. Apply the same liner above the lashes and blend out to create a sultry, smokey look.
-
Add a wing. If you want, you can go ahead and add the ever-popular winged liner. Currently, the kitten line is the trend to try. Softer and less bold, the kitten liner is ideal for beginners or those of us who want a look that’s understated, but still show stopping.
Start from the finished end of your upper lash line and work in small strokes just as you did to fill in the water line. Blend the color out to create a soft, muted flick instead of a bold dash of liner. A liquid liner with a felt tip is great for a clean wing, while an angled brush with gel liner is great for the kitten liner. - Mascara: Finally, curl your lashes and add mascara. The more mascara, the more dramatic the idea. Curling your eyelashes is the key to open, fresh eyes. Many of us are tempted to skip this step, but don’t— it will add a subtle, yet perfect, finishing touch. My go to MASCARAS.
Finishing Touches
Once your eye look is completed, you can follow these simple steps to apply your face makeup!
Undoubtedly, you’ll have a little bit of eyeshadow fallout to wipe away before you can apply your foundation and concealer. For a lighter look, I love to use my TINTED PRIMER. The perfect combination of skincare and coverage, your complexion will look even and dewy.
To ensure you don’t undo the perfect eye you've just applied, I like to apply small dots of product around the eye. I then blend out away from the eye. This is one technique—among many— I teach in all of my MAKEUP WORKSHOPS.
Effortless elegance is right at your fingertips if you follow my foolproof makeup application steps! Put your best foot—and face—forward this fall.